(教程来源于互联网,感谢原作者的分享。保存自用一下懒得以后更新再去找这个教程了)
美化教程
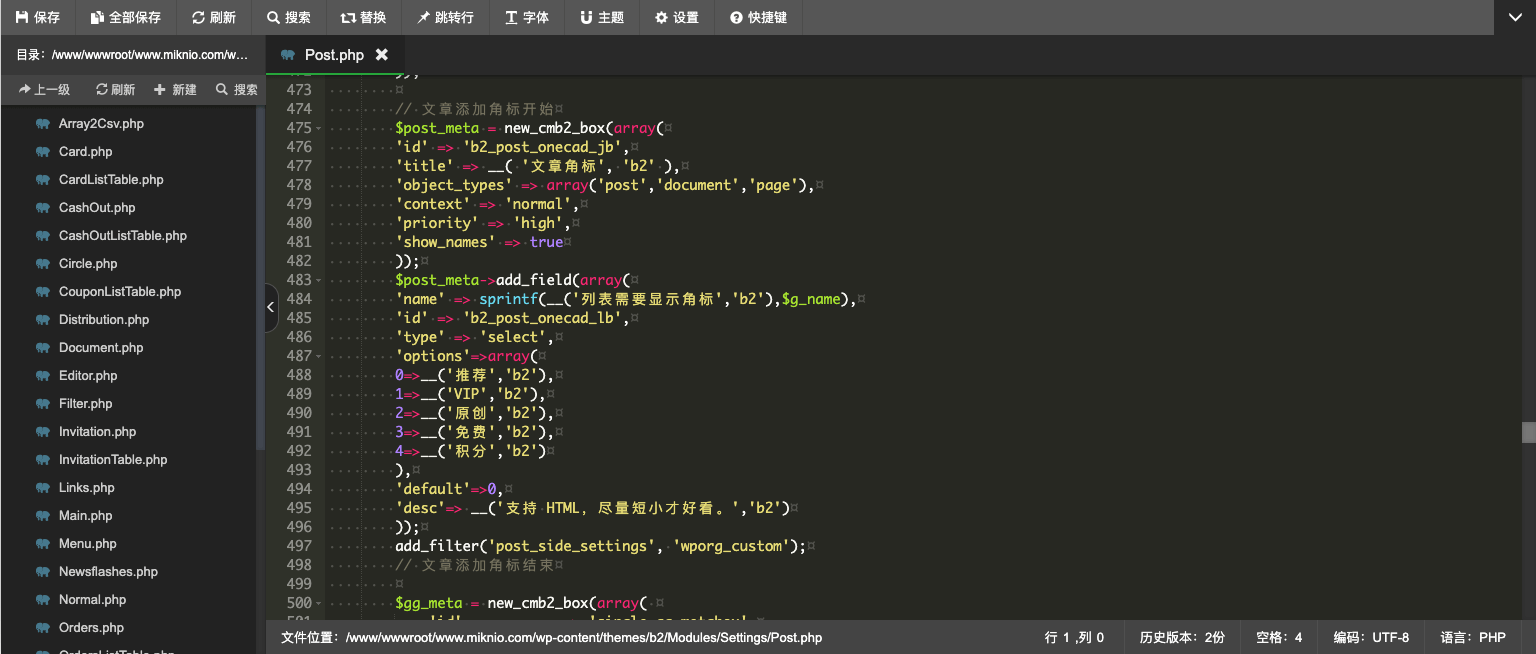
1.修改b2主题目录下 /b2/Modules/Settings/Post.php 文件,在$gg_meta = new_cmb2_box 之前添加:
// 文章添加角标开始$post_meta = new_cmb2_box(array('id' => 'b2_post_onecad_jb','title' => __( '文章角标', 'b2' ),'object_types' => array('post','document','page'),'context' => 'normal','priority' => 'high','show_names' => true));$post_meta->add_field(array('name' => sprintf(__('列表需要显示角标','b2'),$g_name),'id' => 'b2_post_onecad_lb','type' => 'select','options'=>array(0=>__('推荐','b2'),1=>__('VIP','b2'),2=>__('原创','b2'),3=>__('免费','b2'),4=>__('积分','b2')),'default'=>0,'desc'=> __('支持 HTML,尽量短小才好看。','b2')));add_filter('post_side_settings', 'wporg_custom');// 文章添加角标结束

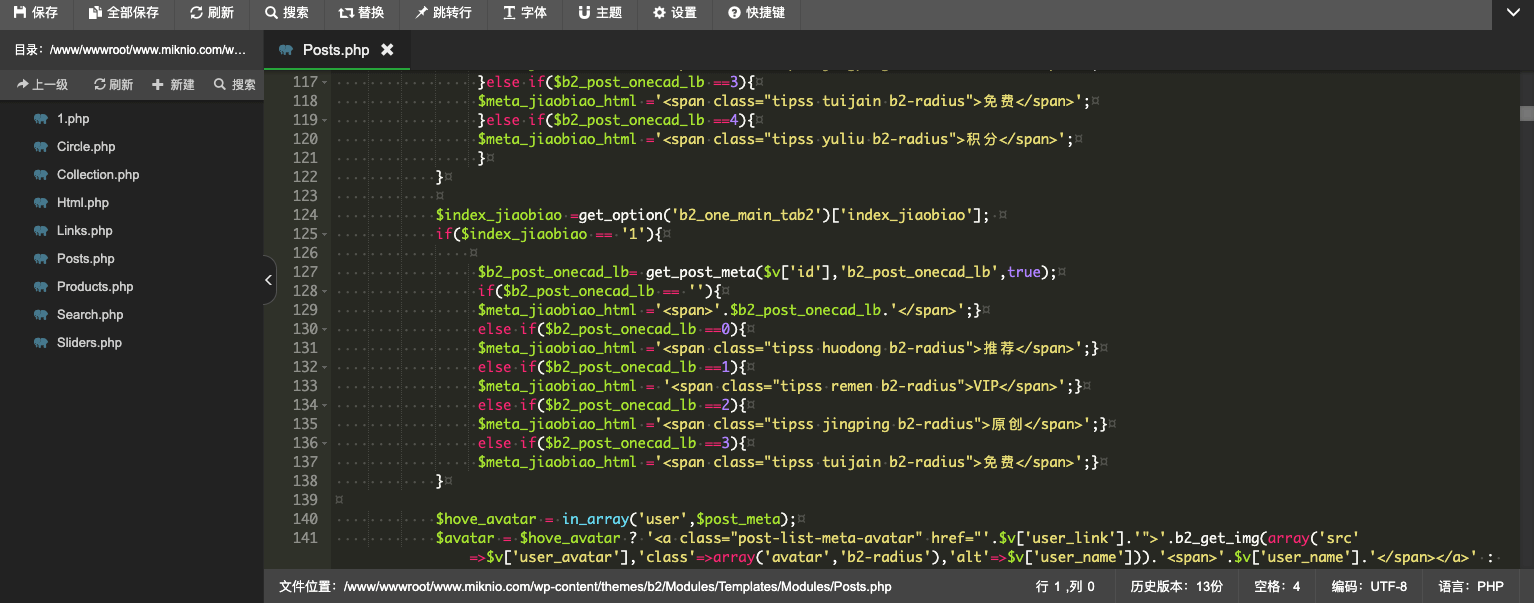
2.修改b2主题目录下 b2/Modules/Templates/Modules/Posts.php 文件,在第一个$hove_avatar前添加以下代码:
$index_jiaobiao =get_option('b2_one_main_tab2')['index_jiaobiao'];if($index_jiaobiao == '1'){$b2_post_onecad_lb= get_post_meta($v['id'],'b2_post_onecad_lb',true);if($b2_post_onecad_lb == ''){$meta_jiaobiao_html ='<span>'.$b2_post_onecad_lb.'</span>';}else if($b2_post_onecad_lb ==0){$meta_jiaobiao_html ='<span class="tipss huodong b2-radius">推荐</span>';}else if($b2_post_onecad_lb ==1){$meta_jiaobiao_html = '<span class="tipss remen b2-radius">VIP</span>';}else if($b2_post_onecad_lb ==2){$meta_jiaobiao_html ='<span class="tipss jingping b2-radius">原创</span>';}else if($b2_post_onecad_lb ==3){$meta_jiaobiao_html ='<span class="tipss tuijain b2-radius">免费</span>';}}

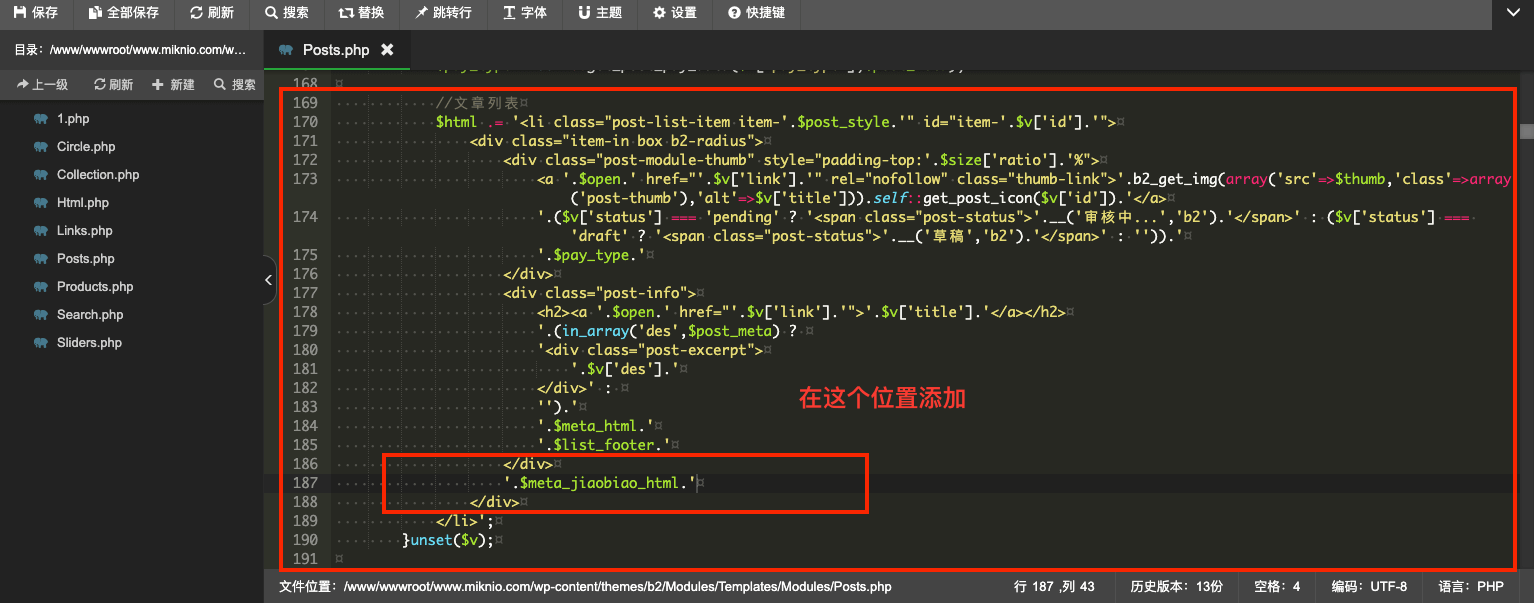
3.在第二步同文件中,大概167行的文章列表中添加以下代码:
'.$meta_jiaobiao_html.'
4.在主题目录或子主题目录的style.css中添加样式代码:
/*角标样式*/.tipss {position: absolute;top: 10px;left: 10px;z-index: 1;width: 50px;height: 20px;color: #fff;line-height: 20px;text-align: center;font-size: 13px;z-index: 5;}.yellow {background-color: #ff6000;}.huodong{background:#00d084}.remen{background:#fcb900}.jingping{background:#cf2e2e}.guanggao{background:#00d084}.tuijain{background:#ff6900}.yuliu{background:#0693e3}
5.大功告成,现在在后台文章编辑中就能看到列表角标设置选择了。
这个教程仅是给网格列表添加了角标,其他列表也可以使用此方法添加。

